In this comprehensive guide, we'll unravel the intricate process of creating a portrait oil painting from photo step by step. We learn the nuances of preparation, drawing, and sketching – the foundational pillars that pave the way for a masterpiece. We share tips & tricks to make the perfect portrait painting from photo.
Introduction to Portrait Oil Painting from Photo
Greetings, fellow art enthusiasts! Have you ever wondered how to create an oil painting from photo that captures the breathtaking beauty of portraits by the old masters? Get ready to embark on an exciting journey into the timeless art of portrait painting.
Portrait painting has been an essential part of art history, dating back to ancient civilizations. From the Roman Empire to the Renaissance, portrait painting has evolved and has been used to capture the likeness and personality of individuals. Throughout history, portrait painting has served as a means of documentation, a reflection of social status, and to build up personalities.
In modern times, portrait painting has continued to evolve, with artists experimenting with different techniques, styles, and mediums. From photorealistic paintings to abstract portraits, the art form has continued to push boundaries and challenge our perceptions of what a portrait should look like.
Understanding the process of creating a portrait painting allows us to appreciate the historical context in which portraits were made. For instance, studying the techniques of Renaissance artists such as Leonardo da Vinci, Michelangelo, and Raphael can provide valuable insights into their creative process and artistic vision.
In this comprehensive guide, we'll unravel the intricate process of creating a portrait painting, from photo step by step. Brace yourselves, as we learn the nuances of preparation, drawing, and sketching – the foundational pillars that pave the way for a masterpiece. By understanding these crucial elements, you'll not only gain a deeper appreciation for the art but also equip yourselves with the skills to embark on your own portrait painting journey. So, grab your brushes, paints, and an open mind, because this adventure promises to be nothing short of captivating!
Preparation to create a stunning Portrait Art
As the age-old saying goes, "Proper preparation prevents poor performance." In the world of Portrait Painting, this adage rings true more than ever. Preparation is the bedrock upon which your artistic vision will flourish.
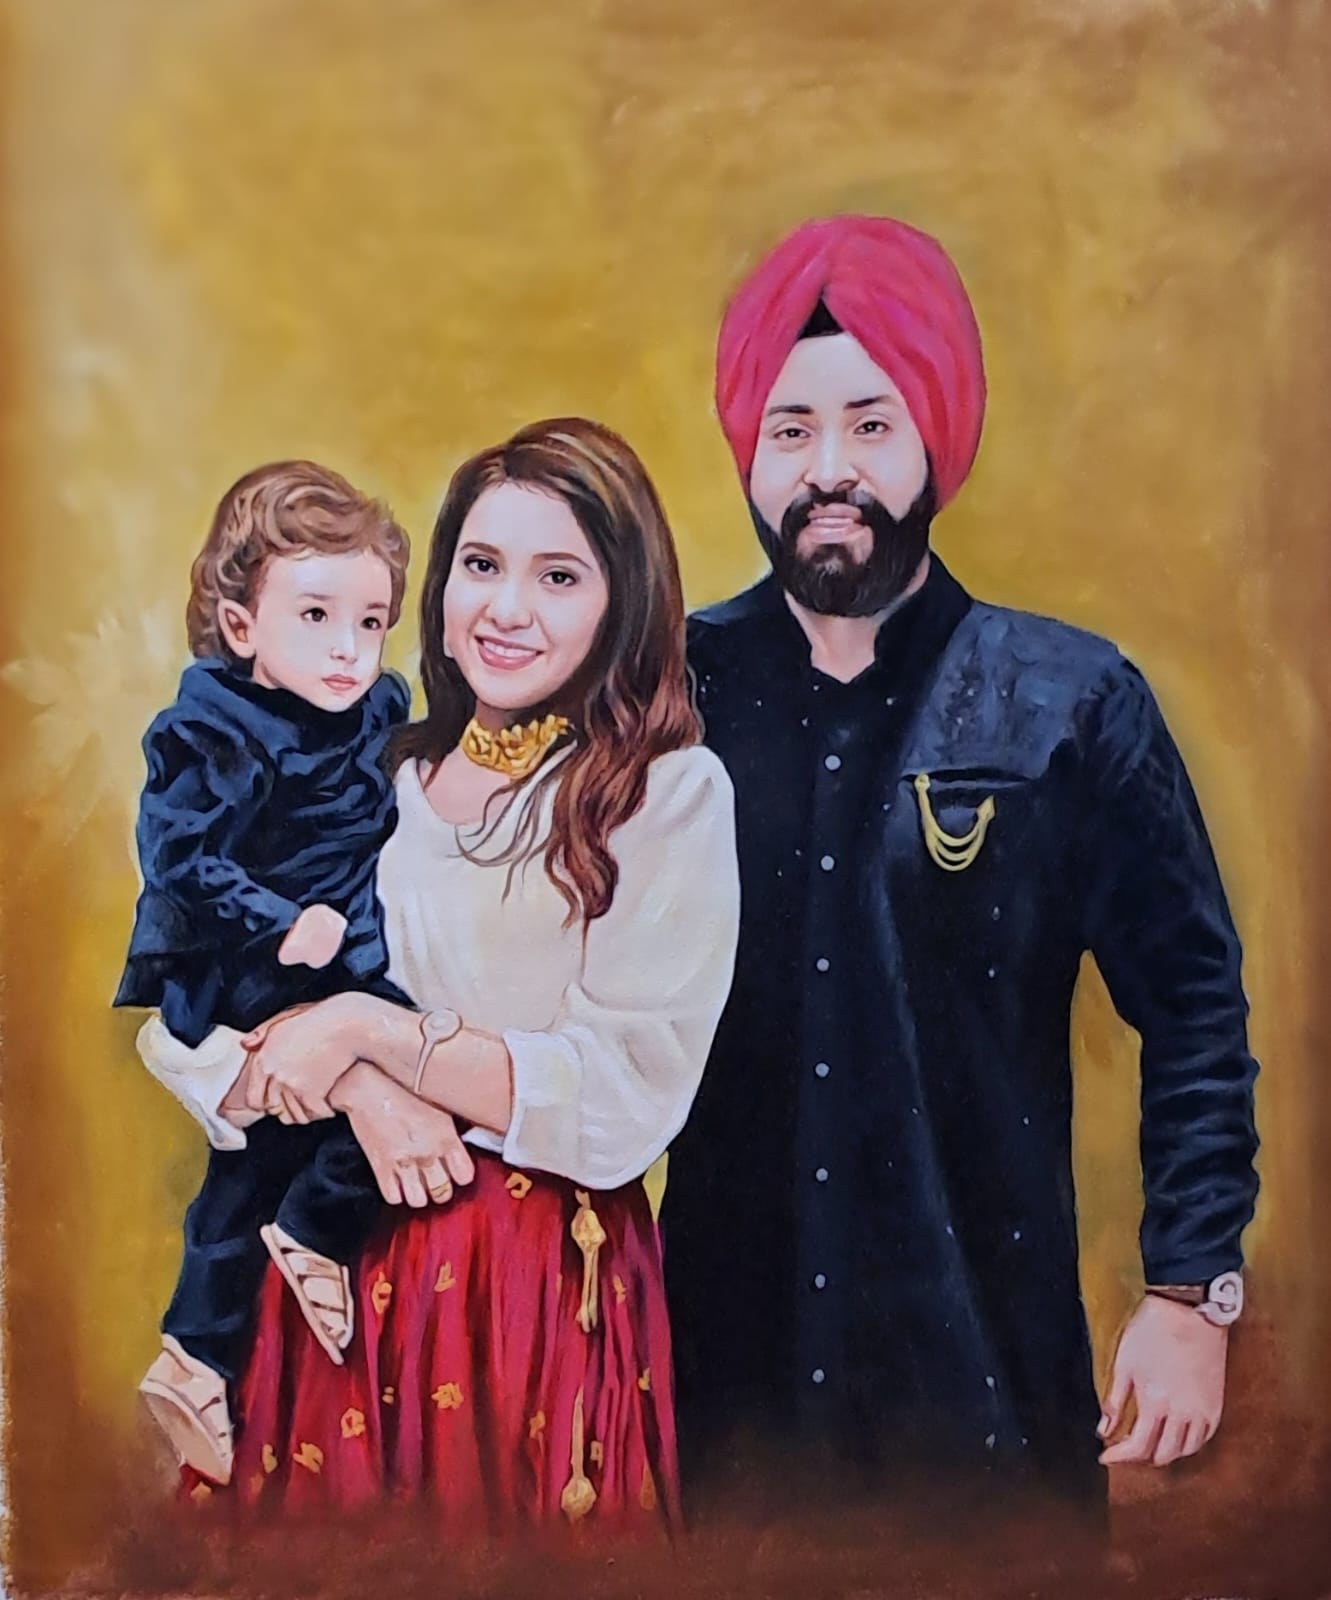
Family Oil Portrait Painting (Image Source: Paintphotographs.com)
It involves several steps that help artists create a well-planned and executed painting. Our discussion in this section will focus on getting ready, selecting a subject, gathering reference material, and designing a sketch and composition. Prepping is essential in creating a portrait painting because it helps artists to:
Define the concept and theme of the Painting: Preparation allows artists to conceptualize the idea and theme of the painting, which helps to guide the creative process.
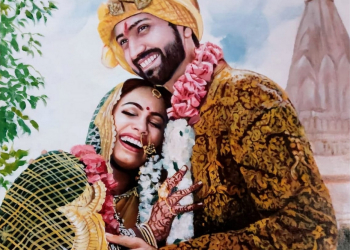
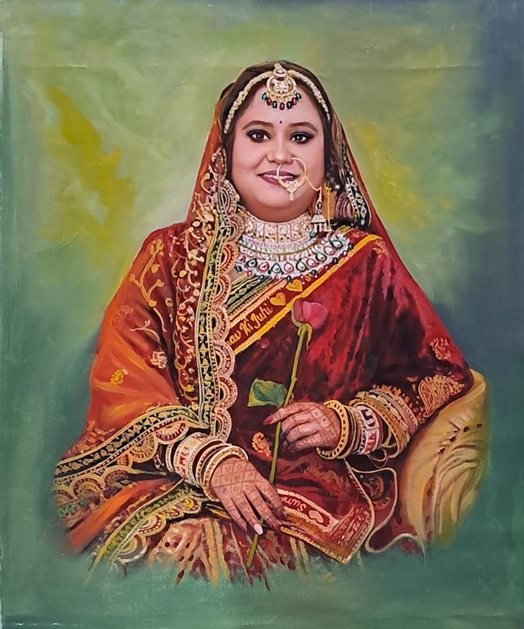 Wedding Painting Gift: Bridal Painting (Image Source: Paintphotographs.com)
Understand the subject: Prepping helps artists to understand their subject's personality, features, and characteristics, which are crucial in creating an accurate and realistic portrait.
Portrait composition planning: It allows artists to plan the composition of the painting, including the placement of the subject, background, and other elements.
Choosing a Subject: Here are some tips for selecting a subject:
-
Choose someone you know: Choosing someone you know can make the painting process easier, as you can observe and study their features and expressions more easily.
-
Consider the person's personality: Consider the person's personality, interests, and characteristics when choosing a subject. This can help guide the concept and theme of the painting.
-
Consider the context: Consider the context in which the portrait will be displayed. For example, to create the right impression in a business setting, it's important to make a portrait that portrays a sense of professionalism and formality.
-
Creating the Art Concept: Once you have chosen a subject, the next step is to create a concept for the painting. Here are some tips for creating a concept:
-
Portrait idea generation: Generate ideas for the portrait that reflect the subject's personality, interests, and characteristics.
-
Research: Research the subject's background, interests, and achievements to gain inspiration for the concept.
-
Take photographs: Take photographs of the subject from different angles and with different expressions. This will help to capture the subject's features and personality accurately.
- Use sketches and studies: Create sketches and studies of the subject to gain a deeper understanding of their features and expressions.
Use a grid: Use a grid to help you divide the canvas into sections, making it easier to plan the composition.
The preparation is a crucial step in creating a successful portrait painting. It involves choosing a subject, gathering reference materials, creating a concept, and planning the composition. By following these steps, artists can create a well-planned and executed portrait painting that captures the subject's likeness and personality accurately.
Order Your Portrait Painting from Photo Today
Wedding Painting Gifts

Canvas Oil Painting from Photo
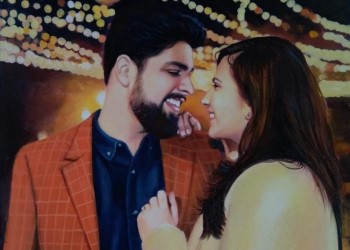
Romantic Couple Painting
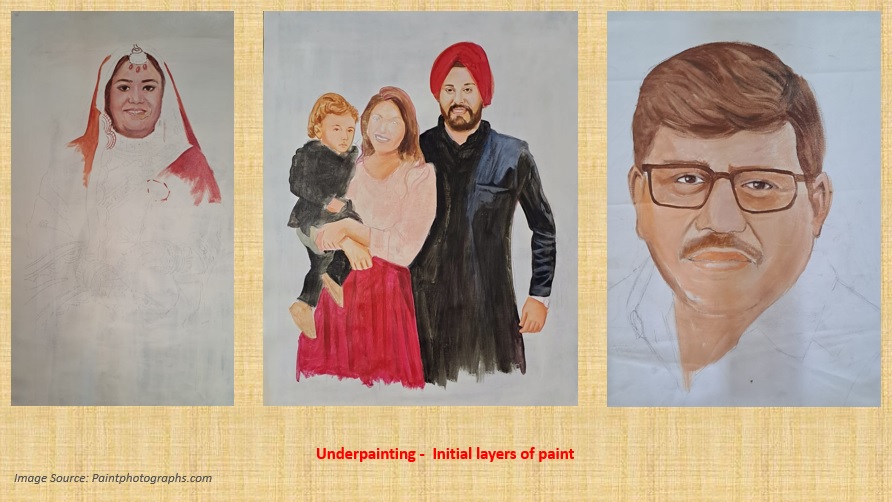
The first step of Portrait Painting - Underdrawing
The first step of portrait painting is the underdrawing - the initial draft of the Portrait Drawing on canvas. The portrait sketch serves as the final piece's foundation and blueprint, allowing the artist to plan out composition, proportions, and details before committing to painting. This phase is where your observational skills and attention to detail will shine, as you translate the essence of your subject onto paper.
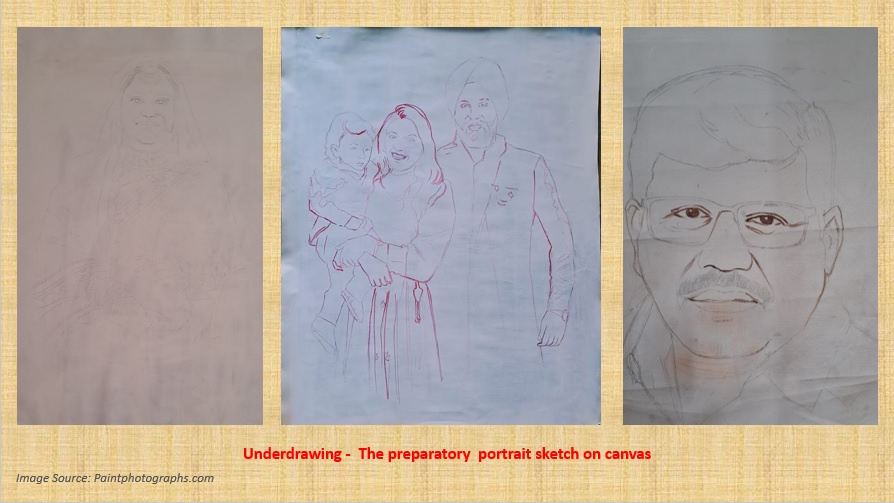 Underdrawing: Sketching the portrait on canvas (Image Source: Paintpotographs.com)
Choose your medium wisely, whether it's the versatile pencil, the boldly expressive charcoal, or the vibrant pastels. Each tool offers unique strengths and challenges.
-
Pencil: Pencils are a popular choice due to their versatility and wide range of tones. They allow for precise lines and subtle shading, making them ideal for capturing details and textures.
-
Charcoal: It comes in various forms, such as sticks, pencils, or compressed blocks. It is excellent for creating bold, expressive strokes and rich, dark tones. It is also easily smudged and blended, allowing for a more fluid and dynamic drawing style.
- Pastel: Pastels are available in both hard and soft forms. They are great for achieving vibrant colors and soft, blended transitions. However, they can be more challenging to erase or modify once applied.
When creating a realistic sketch of a subject, consider the following tips:
Proportions: Accurately depicting the size and placement of facial features is essential for a convincing portrait. To ensure proper proportions, use guidelines, such as dividing the face into equal thirds or using the width of the eyes as a reference for spacing.
Facial features: Pay close attention to the shape and placement of facial features, such as the eyes, nose, and mouth. Observe how these features relate together and the overall structure of the face.
Facial expression: Capturing the subject's expression is vital for conveying their personality and mood. Study the subtleties of the eyes, mouth, and eyebrows, as these areas are particularly expressive.
Light and shadow: Analyze the way light falls on the subject's face, identifying areas of light, shadow, and highlight. This will help you create depth and form in your sketch.
Practice: Regularly drawing from life or reference images will help you develop your observational skills and improve your ability to create realistic portraits.
Study the interplay of light and shadow, allowing your strokes to create depth and form that leaps off the page. And most importantly, infuse your sketch with the subtle nuances of expression that reveal your subject's personality and emotional state.
You can also study the methods of John Singer Sargent, considered the greatest portrait painter in the world, who laid down his portrait painting tips and techniques that we had covered earlier.
Incorporating these techniques and tips into your drawing and sketching process, you will be better equipped to create a strong foundation for your portrait paintings.
Remember, the path to mastery is paved with practice and perseverance. Regularly draw from life or reference images, honing your observational skills and refining your ability to create lifelike portraits. With each sketch, you'll inch closer to capturing the essence of your subjects with unparalleled authenticity.
Creating the Portrait Painting: It's Time to Unleash Your Brushstrokes!
We prepped, sketched, and now it's time to unleash the power of your brushstrokes! Get ready to transform flat canvases into vibrant, masterpiece Portrait art that'll have jaws dropping and hearts racing.
First up, let's talk mediums. You've got options galore. each with its unique characteristics and benefits:
Oil Paint: Oil paint is known for its richness, depth, and slow drying time. This slow drying process allows for blending, layering, and adjustments over an extended period. Oil paint is used to create smooth, seamless transitions and detailed textures.
Acrylic Paint: Acrylic paint dries quickly, making it a more forgiving medium for beginners. It is also water-soluble, allowing for easy cleanup and blending. Acrylic paint is used to achieve a wide range of effects, from thick, impasto textures to smooth, polished finishes.
Watercolor: Watercolor paint is known for its transparency and luminous quality. It is typically used for more loose, expressive styles due to its unpredictable nature.
But before you go all Picasso on that canvas, let's talk color theory. It's like the secret sauce that'll take your portraits from "meh" to "OMG, that's insane!"
Understanding color theory is essential for creating a harmonious and cohesive color palette in portrait painting. Key concepts include:
Color wheel: Familiarize yourself with the color wheel, which organizes colors based on their relationships to each other. Understanding primary, secondary, and tertiary colors, as well as complementary, analogous, and split-complementary color schemes can greatly aid in your grasp of color theory.
Warm colors, cool colors, and complementary colors: Warm colors (red, orange, and yellow) tend to advance and appear more vibrant, while cool colors (blue, green, and purple) tend to recede and appear more subdued. Balancing warm and cool colors can create depth and interest in your portrait. Complementary colors are pairs of colors that, when combined, cancel each other out
Hue and saturation: Refers to the lightness or darkness of a color. Establishing a range within your color palette will help you create depth and form in your portrait.
Order Your Oil Portrait Painting on Canvas from Photo Today

Family Painting from Photo
Memorial Painting from Photo
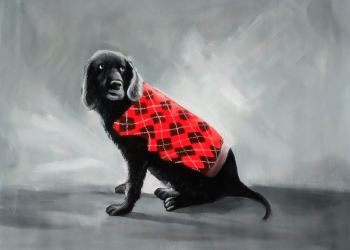
Pet Portrait Painting from Photo
Working in layers to nail those skin tones
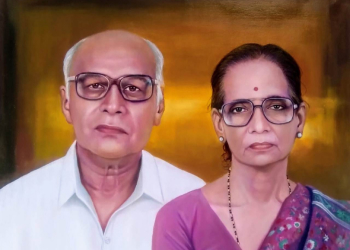
Start with underpainting the underdrawing with a neutral base, then slowly build up those warm and cool tones, like a master chef layering flavors in a gourmet dish. Use those glazes like a boss to add depth and dimension, and don't be afraid to get up close and personal with your subject's unique hues and textures. It's all about working in layers, blending, and observing like a hawk. Check the works of renowned portrait artists like Raja Ravi Varma, Pestonji Bomanji, MV Dhurandhar, and Hemen Majumder to learn their painting techniques.
 Underpainting: Adding base color to portrait painting (Image Source: Paintphotographs.com)
To create a realistic skin tone and texture in your portrait painting, consider the following tips:
Observe and analyze: Study the subject's skin tone, paying attention to variations in color, value, and temperature. Identify areas of warmth (cheeks, nose, and forehead) and coolness (under the eyes, chin, and jawline).
Working in Layers: Build up skin tones by working in layers, starting with a base layer of a neutral tone (such as burnt sienna or raw umber) and gradually adding warmer and cooler tones on top. This will create a more natural, dimensional appearance.
Use glazes: Apply thin, transparent layers of paint (glazes) to adjust the color, value, or saturation of underlying layers. This technique can help you achieve subtle, gradual transitions and a lifelike glow.
Blend carefully: Maintain distinct transitions between warm and cool areas when blending colors. Avoid over-blending, as this can result in a flat, unrealistic appearance.
Regularly painting from life or reference images will help you develop your skills in observing and replicating skin tones and textures.
Overpainting the Portrait: Add finishing touches :
Once the underpainting of the Portrait painting is done, its time for overpainting. Portraitures are all about the details. Paying close attention to details in a Portrait painting is crucial for capturing the unique character and personality of the subject. Facial features like the eyes, eyebrows, and hair are critical areas to focus on. They can convey the emotional depth and individuality of the subject. A mistake here and the portrait will “look off” from the subject.
Eyes: the focal point of a portrait are often the eyes, as they can express a wide range of emotions. Capture the soul in those eyes. Ensure that they are accurately positioned and proportioned, and pay close attention to the shape, color, and placement of the iris and pupil. Ensure the eyes are alive and realistic with catchlights.
Eyebrows: Facial expressions are framed by eyebrows and help define the eyes. Accurately depicting the shape, angle, and thickness of the eyebrows is essential for creating a convincing portrait.
Portrait's hair: A portrait's hair adds texture, volume, and style. Observe the subject's hair color, texture, and parting, and consider how these elements contribute to their overall appearance. When painting hair, use loose, expressive brushstrokes to capture the movement and flow of the hair.
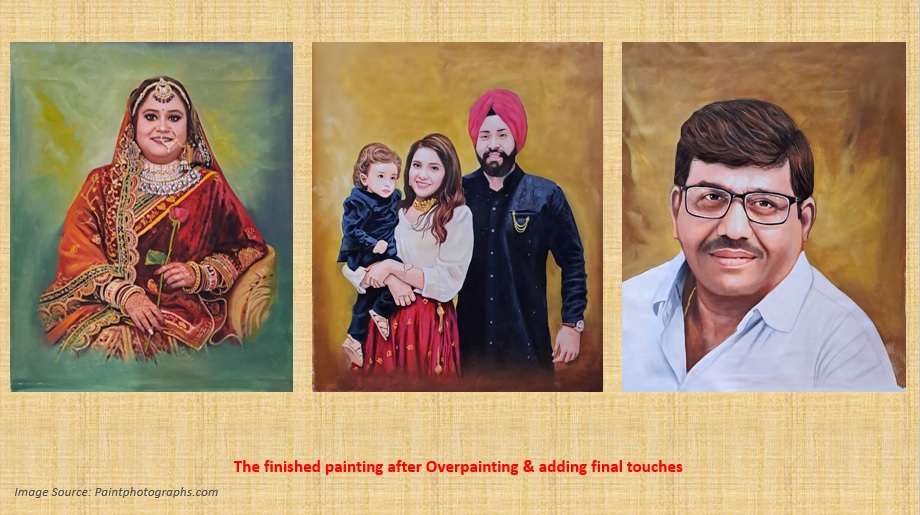 Overpainting: Adding finishing touches to canvas oil portrait painting (Image Source: Paintphotoraphs.com)
To add texture and depth to a portrait painting, consider the following techniques:
Impasto: Apply paint thickly in some areas to create impasto textures and add visual interest. Use a palette knife or stiff-bristled brush to apply the paint, and vary the thickness of the application for a more dynamic, realistic appearance.
Glazes and varnishes: Apply glazes or varnishes to enhance the depth and luminosity of the painting. They are thin, transparent layers of paint that can alter the color, value, or saturation of underlying layers. Varnishes provide a protective, glossy finish and add a professional touch to the final piece. Nowadays, varnishes are not required as the colors from reputed international brands, come with protective chemicals that protect the painting.
Once you have mastered the basics of the painting you can move to more advanced painting techniques like alla prima, sfumato, and fat over lean, to add more depth and texture to your painting making them more realistic.
When adding finishing touches to a portrait painting, consider the following tips:
Touchups to the portrait: Take a step back and assess the painting as a whole, making any final adjustments as needed. This may include touching up colors, values, or edges, or making minor corrections to the composition or details.
Sign your painting: In a discreet area, such as the bottom corner or along the edge of the canvas or paper. This identifies the work as your own and adds a personal touch to the piece.
Document the work: Create a record of the painting, including photographs, notes, and any relevant details about the subject, materials, or process. This documentation can be helpful for future reference or promotion.
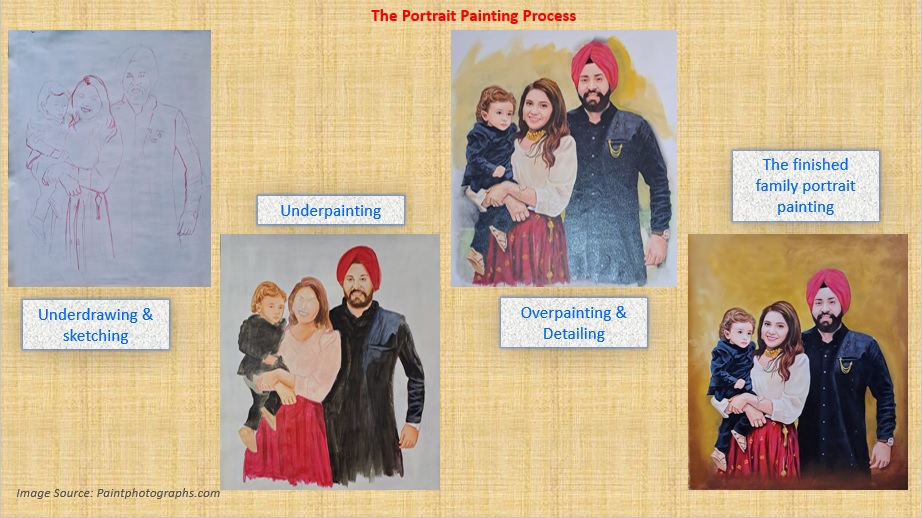 Portrait Painting Process: Underdrawing, Underpainting, Overpainting (Image Source: Paintphotographs.com)
Portrait painting is a rewarding and engaging process that involves several key steps. Begin by gathering reference materials and planning your composition, then draw and sketch to establish proportions, facial features, and expressions. Next, select your painting medium (like oil, acrylic, or watercolor) and develop a color palette based on color theory principles.
As you paint, focus on capturing realistic skin tones and textures by layering colors, using glazes, and blending carefully. Pay critical attention to details, particularly in the eyes, eyebrows, and hair. Incorporate techniques such as impasto textures, collage elements, and varnishes to add depth and visual interest.
Patience, practice, and attention to detail are essential to create a successful portrait painting. Developing observational skills and refining techniques takes time and dedication. Don't be afraid to experiment with different styles, mediums, and approaches to find what works best for you.
So, what are you waiting for? Grab those brushes, crank up that playlist, and let your inner Rembrandt loose! The world needs more art that speaks to the soul, and you, my friends, have the power to make that happen. Now, go forth and slay!
Handmade Art Reproductions & Landscape Paintings
Old Master Reproduction Paintings
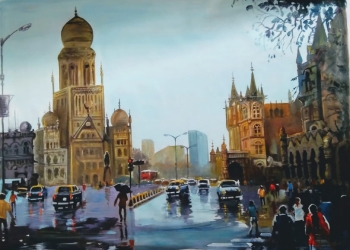
Scenery & Landscape Paintings
Contemporary Art Reproductions
About Us:
Paintphotographs.com is India's leading custom art platform. We turn your favorite photos, pics, and images into luxurious handmade portrait paintings. Our work includes handmade portraits, custom oil reproductions, charcoal drawings, and sketches. As a team of accomplished artists, we use museum-quality canvas, the best international brands of colors such as Winsor & Newton and Daler Rawney. We work with various mediums, including oil, acrylic, mixed media, graphite, and charcoal.
To order a custom handmade oil portrait painting you can visit our order now page. You can order custom Wedding Paintings, Couple Paintings, Memorial Paintings, Family Paintings, Baby portraits and Children Paintings, Photo to paintings, and Pet Portrait Paintings from Photo.
You can visit our pricing page to know the prices of our portrait paintings. To connect with us ping us on our chat messenger on the website, ping us on WhatsApp, call us at 918291070650, or drop us an email at support@paintphotographs.com
You can visit our gallery pages to see our work. We make photo to paintings, couple paintings, memorial paintings, Kids and Baby Portrait paintings, God & Religious Paintings, Old Photo to Paintings, Wedding couple Paintings & Marriage Portraits, Family Paintings, Pet Portrait Paintings, Radha Krishna Paintings, Oil Portraits of Gurus, Saints & Holy Men, Charcoal and Pencil Sketches, Custom Landscape & Cityscape paintings, Contemporary Art Reproduction & Replica Paintings, Old Master Reproduction & Replica Art, Monochrome and Black & White portrait paintings, Historical Portraits and Shivaji Maharaj Paintings, Celebrity & Political Leaders Portraits. We can also merge separate photos to create a single seamless painting called Composite portraits to add deceased loved ones to make a family oil portrait as though they were present.
Our custom handmade portraits make beautiful Anniversary Gifts, Engagement Gifts, Birthday Gifts, Retirement Gifts, Housewarming Gifts, Mother's Day gifts, and luxurious gifts for many important occasions.
Paintphotographs.com provides bespoke services for art patrons, interior designers, and architects. It helps you create the perfect pieces for residential and commercial projects and serves as a platform for artists to showcase their work.
If you are an art aficionado interested in writing a guest post on art, connect with us.
Want to read more? Check our reading recommendations below! Please refer to the Notes and Reference section for sources referenced in the article.
Like this story? Then you will love our podcasts on Spotify. Listen to our deep dives and fascinating stories from the art world. Join our nearly 20,000-strong community on Facebook, WhatsApp, and X.
Want to see our art? Join our community of 500,000+ subscribers on the Paintphotographs YouTube channel, Instagram, and Pinterest for some amazing art pics & art videos!
Recommended Pieces
How to Convert Your Photo into a Canvas Portrait Painting Online - Handmade
A Closer Look at the Stunning Paintings in Coca-Cola's Latest Ad “Masterpiece” | Paintphotographs
Photorealism: The Art of making a painting from a photo. | Paintphotographs
The life and paintings of artist and painter KCS Paniker | Paintphotographs
Why is Monalisa so famous? Monalisa's portrait painting history | Paintphotographs
Memorial Paintings - The Ultimate Guide to Commissioning one | Paintphotographs
India's Greatest Portrait Painters: Lives of 13 Oil Portrait Painting Masters | Paintphotographs
Ultimate 20 Best Oil Portrait Paintings of John Singer Sargent (Ranked) | Paintphotographs
10 Famous Romantic Raja Ravi Varma Paintings | Paintphotographs
The Artistic Genius of Abanindranath Tagore: Rediscovering His Early Works | Paintphotographs
Notes & Reference
https://www.google.co.in/books/edition/Drawing_Portraits/kzcFAAAACAAJ?hl=en
https://www.google.co.in/books/edition/Beautiful_Portrait_Painting_in_Oils/gY2PEAAAQBAJ?hl=en
https://www.google.co.in/books/edition/Color_Mixing_Recipes_for_Portraits/iRwoEAAAQBAJ?hl=en
https://www.amazon.in/Everything-Painting-Richard-Swatland-Paperback/dp/096621174X